- Service ▼
- Products ▼
✨ 20+ Years Experience | 5,000+ Global Brands All Products →
- Sustainability
- About Us ▼
- Related Resources ▼
- Contact Us
Making a custom box takes five engineering milestones: (1) measure the inner dimensions and draw a vector die-line; (2) match the box style to corrugated or greyboard board weight; (3) print brand colors and apply surface finishing; (4) build a physical pre-production sample; (5) mass die-cut, form and glue with QC.
In this guide, you’ll learn:
The table below maps every stage of making a custom box, from die-line to delivery, with the engineering parameter you should confirm with your supplier before production starts.
| Stage | Key engineering parameter | Deliverable / proof |
|---|---|---|
| 1. Structure & die-line | Inner dimensions + 1–3 mm clearance, 3 mm bleed | Vector die-line (AI / PDF) |
| 2. Material matching | E-flute corrugated or 1200 gsm greyboard | Material spec sheet |
| 3. Printing & finishing | CMYK / Pantone, matte or soft-touch lamination | Color proof / press sheet |
| 4. Pre-production sample | Physical dummy checked against tolerances | Signed sample for approval |
| 5. Mass production & QC | Die-cut, form, glue, AQL inspection | Packed cartons + QC report |
Every custom box starts with a measurement, not a design. To make a box that holds a product snugly without rattling or bulging, measure the inner dimensions — length × width × depth — and add 1–3 mm clearance depending on the board thickness and product tolerance. A common beginner mistake is measuring the outside of an existing box, which produces a box that is too tight. Our step-by-step box dimension measuring guide covers exactly how to do this.
Once the dimensions are fixed, the structure is drawn as a vector die-line (also called a cutting die or die-cut drawing). The die-line is a flat technical drawing that marks every cut line, crease line, glue tab and bleed area. It is the single most important file in custom box making, because the factory’s die-cutter, folder and gluer all follow it — a 0.5 mm error here becomes a 500-box error later.
Choose the box style from the product weight, the shipping method and your brand positioning. A light retail item such as a lipstick, eyebrow pencil or candle can use a 350g coated paper card box — inexpensive and easy to print. A product that has to survive shipping is better in corrugated board: our corrugated mailer boxes use E-flute board (about 1.5–2 mm thick) for rigidity at low weight, paired with a 250 gsm surface paper.
For a premium gift or unboxing experience, rigid boxes are the standard. The core is greyboard — 1200 gsm is the most common weight for a sturdy, non-flexing wall — wrapped in printed art paper. Popular rigid structures include the magnetic folding box, which closes with hidden magnets, and the classic lid and base box.
| Box type | Core material | Typical thickness | Best for |
|---|---|---|---|
| Paper card box | 350–400 gsm coated paper | 0.4–0.5 mm | Cosmetics, candles, small retail |
| Corrugated mailer | E-flute + 250 gsm surface paper | 1.5–2 mm | E-commerce, shipping-ready boxes |
| Rigid / magnetic box | 1200 gsm greyboard + printed art paper | 2–3 mm | Gift sets, premium unboxing |
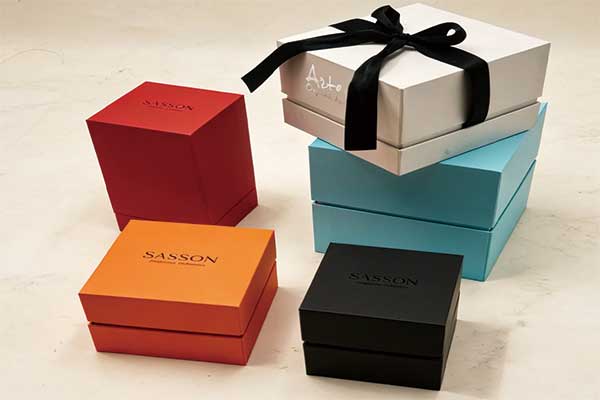
Choosing the right box style and material is the foundation of making a custom box.
You normally print only the outer surface of the box, because the reverse side is glued to the greyboard or corrugated board. Two methods dominate custom box printing. Digital printing suits small batches — from a single prototype up to about 50 boxes — with high color accuracy and no plate cost. Offset printing (CMYK) wins on runs of hundreds to thousands of boxes, where it is faster and cheaper per unit; brand colors can be locked with a Pantone (PMS) match.
The last printing step is lamination, applied with BOPP film. Choose matte for a soft premium feel, gloss for vivid color, or soft-touch for a velvety texture. Spot UV, foil stamping and embossing can be added on top of the laminate to make your logo tactile and memorable.
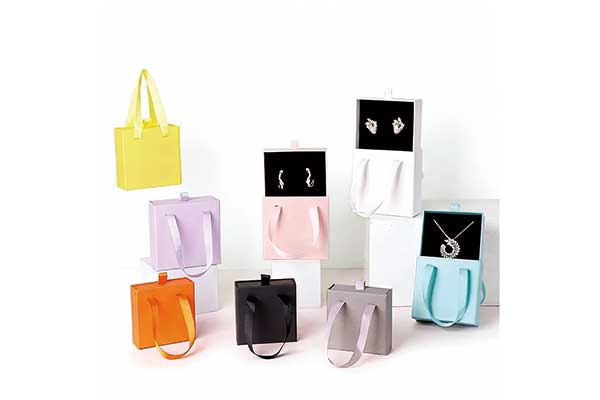
Printing and lamination bring your logo to life.
Never send a custom box straight to mass production from a screen proof. A physical pre-production sample — sometimes called a dummy or a white sample — is built with the real board, the real die-line and the real finishing, so you can test product fit, color accuracy, glue strength and opening feel. This is the cheapest moment to catch a wrong crease or an undersized wall; changing a structure after the die has been cut is far more expensive. A physical sample is also what separates a professional custom box supplier from a low-cost trading middleman.
Once the sample is signed off, the factory runs the job in four moves: printing the sheet, die-cutting the flat structure, forming and gluing, then QC and packing. Rigid boxes additionally require the greyboard to be V-cut before the printed paper is wrapped and pressed around it. Throughout the run, an AQL inspection checks print registration, glue adhesion and dimensional tolerance so that every carton matches the approved sample.
This is exactly how boxes are built at our Shenzhen custom box manufacturing facility — from the first vector die-line to packed, shipping-ready cartons. For paper card boxes, the printed sheet is die-cut, glued on the tabs and folded. For corrugated boxes, the surface paper is laminated onto the corrugated board and bonded before cutting. For rigid boxes, the printed paper is glued onto the greyboard and pressed flat.
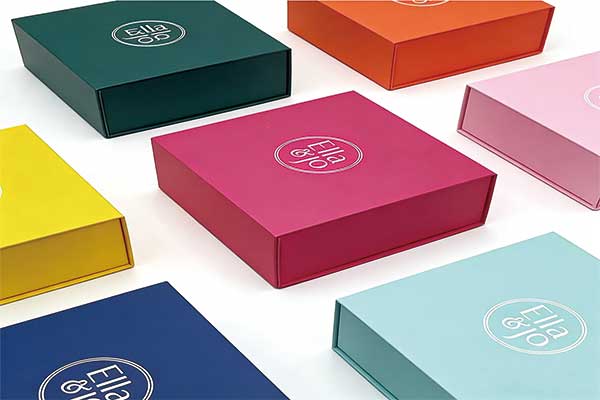
Your final custom box, ready for products and branding.
If your goal is a one-off craft box, a handmade method is fine. If your goal is a branded, repeatable product box, a factory is the only way to hold quality and cost at scale. Here is the honest comparison.
| Factor | DIY handmade box | Factory custom box (Jinglin) |
|---|---|---|
| Structure | Hand-cut from scrap card | Vector die-line, ±0.5 mm tolerance |
| Material | Recycled card / poster board | E-flute corrugated, 1200 gsm greyboard |
| Printing | Home printer, sticker label | Digital or offset CMYK + Pantone |
| Finishing | None or clear tape | Matte / soft-touch lamination, foil, spot UV |
| Sample | The box itself | Approved physical pre-production sample |
| Minimum order | 1 box | MOQ 500 boxes |
| Lead time | Hours per box | 7–15 days after sample approval |
| Best for | Craft, prototypes, gifts | Retail brands, e-commerce, gift sets |
Now that you know how to make a custom box with a logo, you can plan your next packaging project with confidence. If you would like professional help with the die-line, materials, sampling or mass production, the team at Jinglin Packaging is ready to support you from concept to delivery.
Send us your product size and logo — our engineers will draft a die-line, quote your run and produce a pre-production sample. MOQ from 500 boxes, 7–15 day production.
Request a Free Quote & Die-line →Send your artwork as a vector file — AI or PDF with fonts outlined. If you only have a PNG or JPG, our engineers can rebuild the die-line for you. Please include the finished inner dimensions, the board type and any Pantone color references so the die-line and artwork align exactly.
A physical pre-production sample is usually ready in 5–7 days after the die-line and artwork are approved. A sample fee applies, and it is normally credited against your mass-production invoice once the run is confirmed.
Choose corrugated (E-flute) when the box must protect a product during shipping and cost per unit matters. Choose rigid greyboard when the box is part of the brand experience — a gift set or magnetic box that must feel solid, heavy and premium.
Our standard MOQ is 500 boxes per design and per size. Smaller trial runs can be discussed for digital-printed paper card boxes, because digital printing requires no printing plate.
Custom box pricing depends on the dimensions, the board grade, the printing method and the order quantity. Because we manufacture in our own Shenzhen factory, factory-direct pricing usually beats trading-company quotes. Request a quote for exact numbers on your project.
Your logo is printed directly onto the box surface during the printing stage, then protected by lamination. For the best result, provide high-resolution vector artwork (AI or PDF) and specify exact brand colors using Pantone (PMS) or CMYK. The manufacturer handles die-cutting, lamination and final assembly.